🌟Introduction
This article will provide a guide on how to set up a Docker and Jenkins server on an Ubuntu server, covering all the necessary steps to install and configure Jenkins for your needs using Terraform. As DevOps engineers, we need Jenkins to help us automate software development processes, and enable us to build, test, and deploy our applications more quickly and efficiently. You can install, configure and start using Jenkins to quickly automate your software development processes.
🔱Prerequisite :
Here are some prerequisites for this project are given below:
Linux
Git and GitHub
Any Cloud Provider in my case, I am using AWS
CI/CD Concept
Jenkins
Docker
Dockerhub
Terraform
AWS Services (EC2, SES, etc.)
📌IMP NOTE:
This setup is chargeable for some amount, an instance that is am using is t2.medium.
🌟Task 1: Create IAM User
Let's start the process of setup your instance for the project, follow these steps:
Log in to your AWS account.

Search for an IAM in the AWS console.

With IAM, administrators can create users, and assign them unique credentials, such as a username and password or access keys, for authentication and also be used to access AWS resources and services.
First, create a user (terraform_demo), you can provide any name.

Second, attach a direct policy to the user.

- Third, attach a policy to your user, I am giving administrative access. You can provide those policy permissions which you want to create aws service.

- Fourth, You go to security credentials, then assign the access key and secret access key to your user. After creating keys now you good to go for your terraform code.

🌟Task 2: Spin up an instance using Terraform Scripts
Use the CLI to create environment variables that contain your keys. First, make sure you have the Access Key and Secret Key of your AWS user. Follow this, if you don't have it.
Once you have your Access Key and Secret Key readily available, run the following commands:
  aws --version
  aws configure
  #then provide access_key and secret_access_key
  export AWS_ACCESS_KEY_ID="<access_key>"
  export AWS_SECRET_ACCESS_KEY="<secret_key>"
Create a Directory structure as per your projects.
mkdir -p g:/Terraform_Project/Terraform_Jenkins
cd g:/Terraform_Project/Terraform_Jenkins
When you’re in the directory you want to work in, go ahead and create various terraform files. You can do this from the CLI using the touch command or by clicking on File in the top left, then New file, saving the file in the correct directory. I’ve created different files of Terraform and then open Visual Studio Code using code . command.
aws_sg.tf
ec2_instance.tf
The first step in writing your configuration file is to assign the Terraform required provider you want to use.
Create "terraform.tf" , "variable.tf" and "provider.tf"
  terraform {
    required_providers {
      aws = {                          #this is my provider: aws
        source  = "hashicorp/aws"
        version = "4.67.0"             #version of provider
      }
    }
  }
provider "aws" { region = var.aws_region #your aws region and its value assigned in variable.tf file }variable "ami" { default = "ami-0f5ee92e2d63afc18" #ami from aws ec2 console } variable "vpc_ID" { default = "vpc-0aef54445ced2dc34" #from vpc console } variable "instance_type" { default = "t2.medium" #from aws ec2 console } variable "instance_name" { default = "Jenkins_Server" #assign any name } variable "key_pair" { default = "Jenkins" #create key pair from ec2 console and download it. } variable "aws_region" { default = "ap-south-1" #aws-region } variable "jenkins_sg_name" { default = "jenkins_security_group" }For instance type, we will not use free-tier instance t2.medium. You can optionally include a tag, and I have given my instance a tag of “jenkins_instance”. So far, our "ec2_instance.tf" file should look like this:
  resource "aws_instance" "my_instance" {
    ami             = var.ami
    instance_type   = var.instance_type
    tags = {
      Name = var.instance_name
    }
    key_name  = var.key_pair
    user_data = file("user_data.sh")

  }
Bootstrap the EC2 Instance to Install and Start Jenkins and Docker Upon Startup
In Terraform, the user_data attribute is used to pass data to an instance at launch time. It is specified as a string in the Terraform configuration file and can contain any valid data that is base64-encoded when the instance launches.
Jenkins is an open-source automation server that provides tons of plugins to support building, deploying, and automating your projects. It is a fantastic CI/CD tool to create and manage pipelines for DevOps projects. To learn more about Jenkins, head on over to their website: (jenkins.io)
Our team would like to use Jenkins to create pipelines but will need a cloud server to run Jenkins on. To create this server, we will bootstrap Jenkins to an EC2 instance, when the team launches the instance, Jenkins will automatically install and start.
The "user_data.sh" file of an EC2 instance is where you can provide a “bootstrap” script that will run upon instance startup.
#!/bin/bash

#Install Docker
sudo apt-get update -y
sudo apt-get install docker.io -y
sudo usermod -aG docker $USER
#Install Jenkins
#Jenkins requires Java to run, so first install Java -->
sudo apt-get update -y
sudo apt install openjdk-11-jre -y

#Long-Term Support release of Jenkins---->

curl -fsSL https://pkg.jenkins.io/debian-stable/jenkins.io-2023.key | sudo tee /usr/share/keyrings/jenkins-keyring.asc > /dev/null

echo deb [signed-by=/usr/share/keyrings/jenkins-keyring.asc] https://pkg.jenkins.io/debian-stable binary/ | sudo tee /etc/apt/sources.list.d/jenkins.list > /dev/null

sudo apt-get update -y
sudo apt-get install jenkins -y
sudo systemctl status jenkins
sudo systemctl enable jenkins
sudo systemctl status docker
sudo systemctl enable docker

docker --version
java -version
jenkins --version
sudo system reboot

You can also use
user_data_replace_on_change = trueThe
user_data_replace_on_change = trueparameter means that if the user_data parameter is changed and you runTerraform apply, Terraform will terminate the current instance and launch a new one to reflect the new user data script.
- In this we not used, but you can.
🔰Create a Security Group
Let’s create our security group that will be assigned to our EC2 instance. To get started, click here to refer to the hashicorp/aws documentation about security groups. We want the security group to allow traffic on port 22 from my IP address, allow traffic from port 8080 (the default port for Jenkins), allowing traffic from port 3000 for (Weather_APPLICATION). By default, AWS creates an “Allow All” egress rule, however, Terraform will delete this default so we need to recreate it using the “egress” block. Enter the following code into the "aws_sg.tf" file:
resource "aws_security_group" "jenkins_sg" {
  description = "security group used by jenkins_instance"
  vpc_id      = var.vpc_ID

  ingress {
    description = "HTTP"
    from_port   = 80
    to_port     = 80
    protocol    = "tcp"
    cidr_blocks = ["0.0.0.0/0"]
  }

  ingress {
    description = "SSH"
    from_port   = 22
    to_port     = 22
    protocol    = "tcp"
    cidr_blocks = ["0.0.0.0/0"]
  }

  ingress {
    description = "HTTPS"
    from_port   = 443
    to_port     = 443
    protocol    = "tcp"
    cidr_blocks = ["0.0.0.0/0"]
  }

  ingress {
    description = "For Jenkins"
    from_port   = 8080
    to_port     = 8080
    protocol    = "tcp"
    cidr_blocks = ["0.0.0.0/0"]
  }

  ingress {
    description = "Weather_App"
    from_port   = 3000
    to_port     = 3000
    protocol    = "tcp"
    cidr_blocks = ["0.0.0.0/0"]
  }

  egress {
    from_port        = 0
    to_port          = 0
    protocol         = "-1"
    cidr_blocks      = ["0.0.0.0/0"]
    ipv6_cidr_blocks = ["::/0"]
  }

  tags = {
    Name = var.jenkins_sg_name
  }
}
🔰Assign the Security Group to the EC2 Instance
Now that we have the code for our security group, we need to let Terraform know to assign that security group to the EC instance that it will create.
#assign security group
vpc_security_groups_ids = [aws_security_group.jenkins_sg.id]

🔰Running Terraform Infrastructure
terraform init
This initializes the backend and downloads the plugins you need to run Terraform with AWS.

terraform vaidate
This command makes sure the syntax of the <file_name>.tf file is correct before you create the infrastructure. It checks that the arguments and references are appropriate, that you aren’t missing any punctuation characters, etc. If you get errors, it will tell you the exact line of the code that needs correcting, so fix it and run terraform validate again until it tells you “Success!”.

terraform validate -out "plan.out"
The output of terraform plan is too much to screenshot, but basically, it will show you what it plans to create. The very last line of output will show a one-line summary of the plan and create a file called "plan.out".

Once the plan appears suitable, run the following command:
terraform apply "plan.out"
Similarly, the terraform apply command will have a lot of output, too much to screenshot. It will go through each resource as it creates it and let you know how long it’s taking each resource to create and when the creation is complete. After all of the infrastructure is created, you should see “Apply complete!”.

🔱Verify newly created Infrastructure
You can confirm the creation of all your resources by accessing the AWS console where you will be able to locate the new security group in the VPC console, the new instance in the EC2 console, and the new bucket in the S3 console.


🔱Verify that You Can Reach Your Jenkins Install via Port 8080 in Your Web Browser
Please make sure the Status check shows 2/2 checks passed for Jenkins_Server

SSH your ec2-instance

It looks like it’s working since we’re getting some HTML back. Now let’s see if we can get the Jenkins landing page in a web browser. In your web browser, input this address:
http://<instance_ip>:8080

If you did, Hurray!!! Your Jenkins server is up and running!
Now Unlock Jenkin with Admin Password by running the below commands
sudo cat /var/lib/jenkins/secrets/initialAdminPasswordBy this command, you will get the admin password paste it here and click on continue
Click on Install Suggest Plugins

Fill below form to provide a username, Name, Email, and password, click on save and continue.
Congratulation Now Jenkin installation has been completed, Now click on start using Jenkins.

Jenkin Dashboard will be opened.

🔱Clean Up
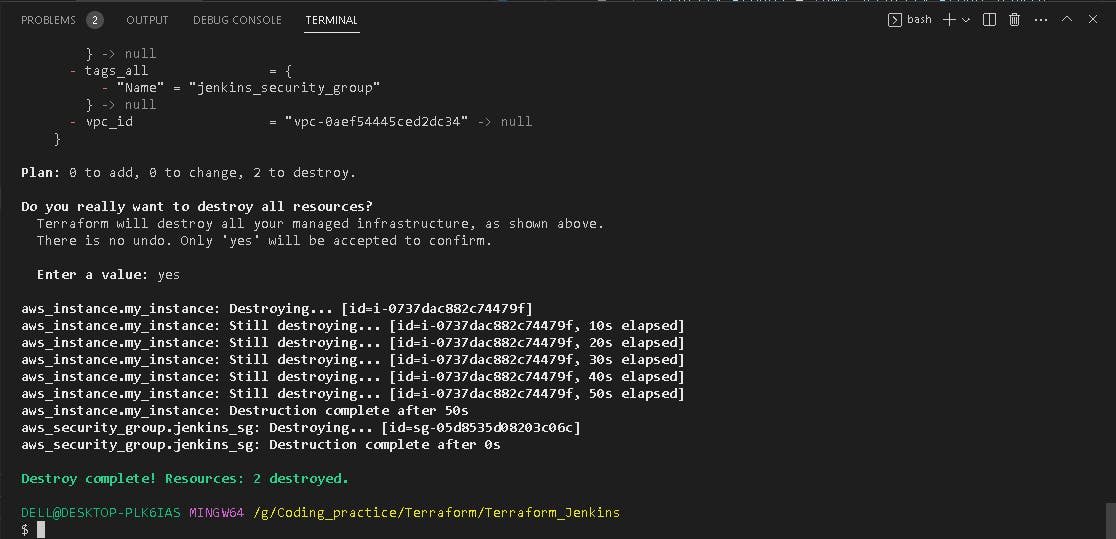
To clean up and delete all of the infrastructure resources we created, run the following command:
🔥Terraform Destroy Command is used when you complete your project, this is only a setup process. The next stage is Jenkins CI/CD pipeline with email message (your build is successful with the project name, build number and build log).
terraform destroy

📌 Jenkins Declarative Pipeline with Email Notification Part-2
Follow this Link for hands-on experience.❄
suggestions are always welcome🔥
🌟Conclusion :
Wooh, you did it! With Terraform, we were able to launch an EC2 instance that was bootstrapped with Jenkins and Docker. I appreciate your participation in this tutorial as we explore Terraform together.
If you have liked this project and my effort please share this and fork my Github repo for more practice.
\...................................................................................................................................................
The above information is up to my understanding. Suggestions are always welcome. Thanks for reading this article.
#terraform #aws #hcl #Devops #TrainWithShubham #90daysofdevopsc #happylearning
Follow for many such contents:
LinkedIn: linkedin.com/in/dushyant-kumar-dk
Blog: dushyantkumark.hashnode.dev
Github: https://github.com/dushyantkumark/Terraform_Jenkins.git
