DevSecOps Project : Swiggy Clone 🍽🥗

📜 Introduction:
In today's fast-paced digital landscape, building and deploying applications not only requires speed but also airtight security. That's where DevSecOps comes into play, blending development, security, and operations into a single, unified process.
In this guide, we will start a journey where we'll leverage Terraform, Jenkins CI/CD, SonarQube, Trivy, Argocd, and Amazon Elastic Kubernetes Service (EKS) to create a robust and secure pipeline for deploying applications on Amazon Web Services (AWS).
Whether you're an experienced developer looking to enhance your DevSecOps skills or a newcomer eager to explore this exciting intersection of software development and security, this guide has something valuable to offer.
Let's start and explore the steps to safeguard your Amazon app while ensuring smooth and efficient deployment process.
📚 Overview:
Infrastructure as Code: Use Terraform to define and manage AWS infrastructure for the application.
Container Orchestration: Utilize Amazon EKS for managing and scaling containerized applications.
CI/CD with Jenkins: Set up Jenkins to automate building, testing, and deploying the application.
Static Code Analysis: Incorporate SonarQube to analyze code quality and identify vulnerabilities.
Container Image Scanning: Integrate Trivy to scan container images for security issues.
Application Deployment with Argocd: Use Argocd for declarative, GitOps-based application deployment on EKS.
📟 Project Resources:
GitHub Link:
SWIGGY-CLONE-REPOSITORY - Application code & Manifest files.
📌 Step1: Create IAM Users
Navigate to the AWS console
Create two IAM user with administration access.
Create two IAM user credentials for ap-south-1, us-east-1.
Create one t2.xlarge EC2 instance with Ubuntu ami using terraform.
Login to the EC2 instance and follow the below steps.
📌Step2: Aws Configuration
Install the AWS Cli in your local machine (windows laptop)
Check AWS CLI is install on your lapto:
aws --version
aws configure
Provide your Aws Access key and Secret Access key

📚 Step3: Terraform files and Provision Jenkins, sonarqube
Check terraform Installation in yor laptop :
terraform --version
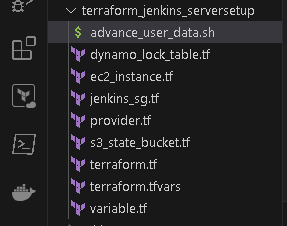
This will install Jenkins, Docker, Sonarqube, and Trivy, kubectl, eksctl, aws cli by Terraform with an EC2 instance(t2.xlarge).
📌 Terraform commands to provision:
terraform init

terraform fmt

terraform validate

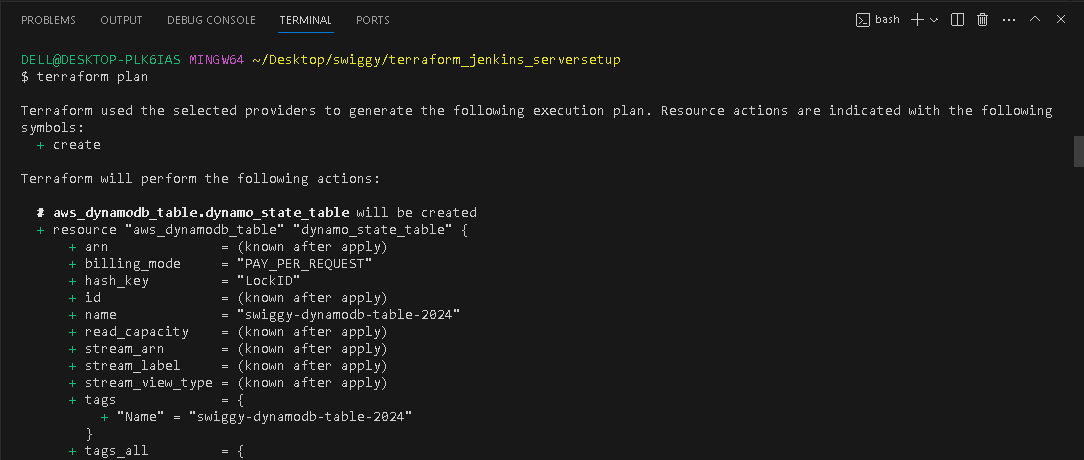
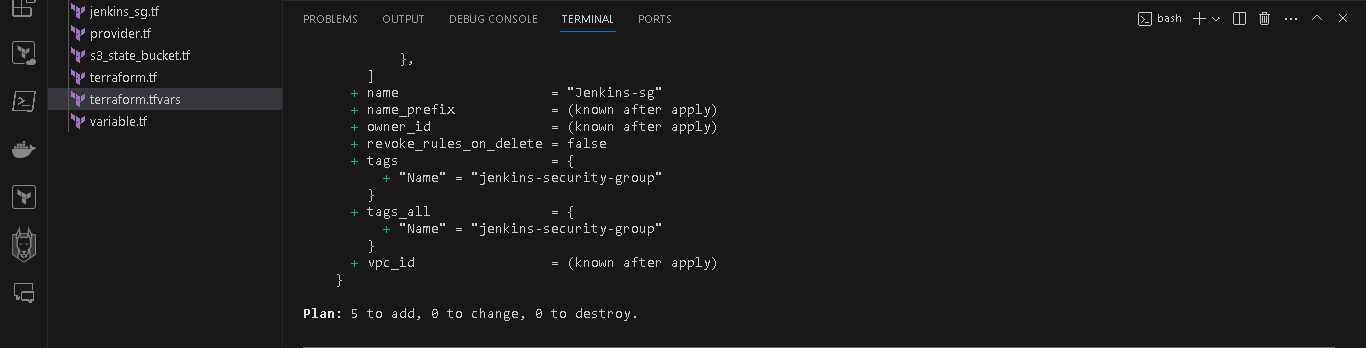
terraform plan
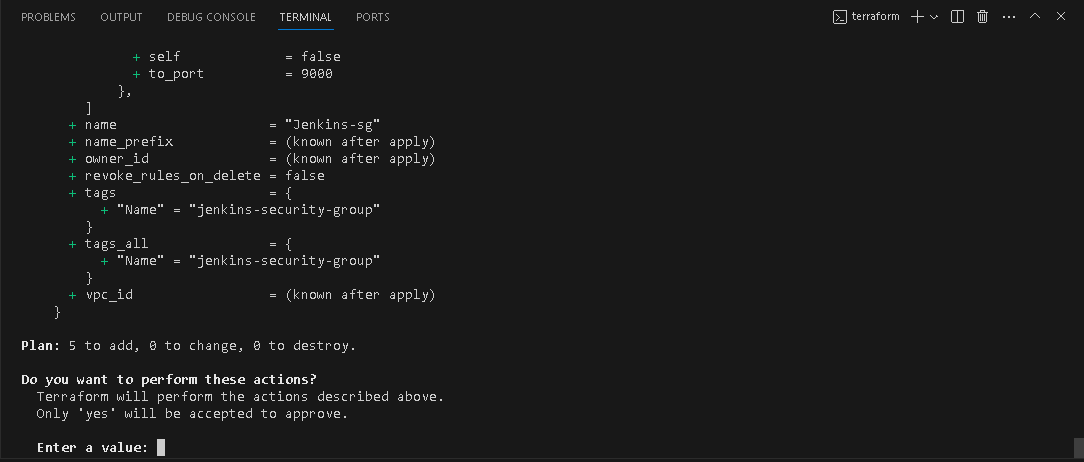
terraform apply

Now uncomments the backend block in terraform.tf file.

terraform init

Output:
The EC2 instance Jenkins-sonarqube-trivy-vm is created by Terraform with Jenkins, Sonarqube, Trivy, kubectl, eksctl, aws cli as userdata for the EC2 instance, which is installed during the creation of the EC2 instance.
S3 bucket is created with terraform.tf statefile present in it and dynamodb table is created for state locking the terraform state.
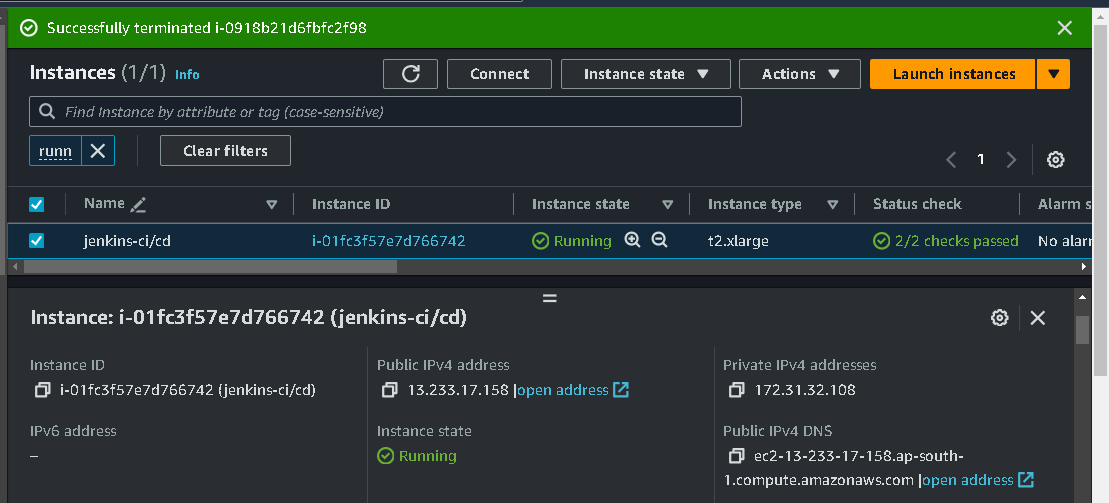


SSH my ec2 instance

<Public IPV4 address>:8080. #For accessing Jenkins
13.233.17.158:8080
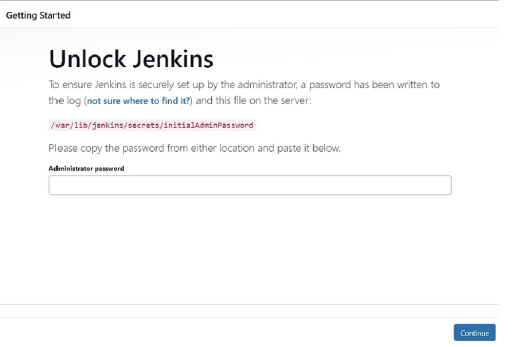
sudo cat /var/lib/jenkins/secrets/initialAdminPassword

Unlock Jenkins using an administrative password and install the suggested plugins.


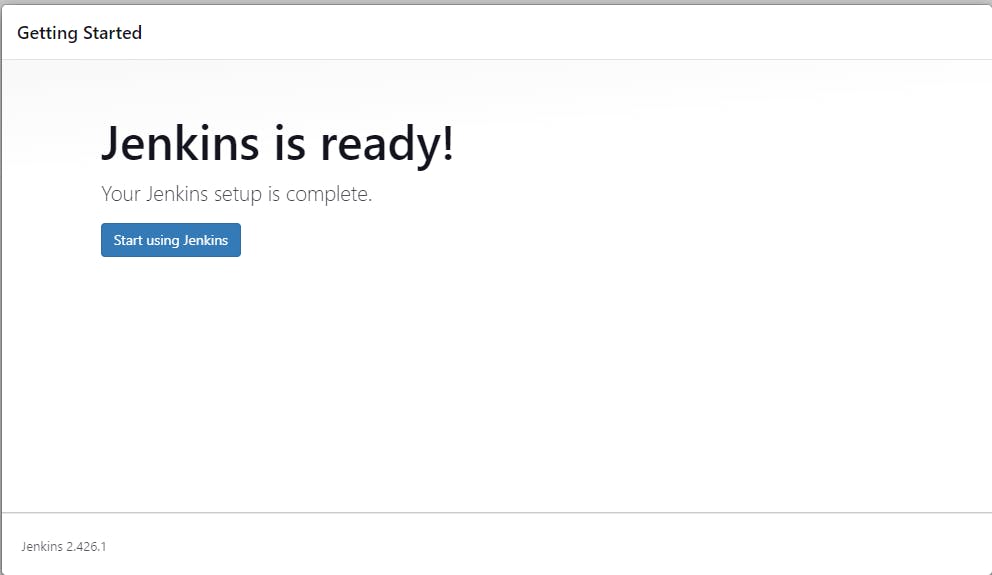
Jenkins will now get installed and install all the libraries.

Create a user, click save, and continue.
Jenkins Getting Started Screen.

Copy your public key again and paste it into a new tab.
<instance-public-ip>:9000
13.233.17.158:9000
Now our Sonarqube is up and running as a Docker container.

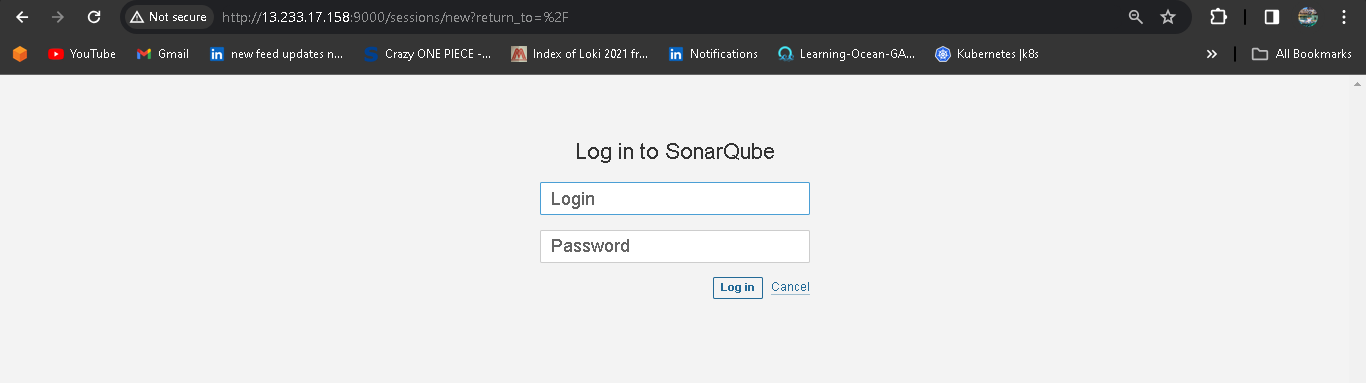
Enter your username and password, click on login, and change your password.
# bydefault username and password is admin
username admin
password admin
Set new password for login.
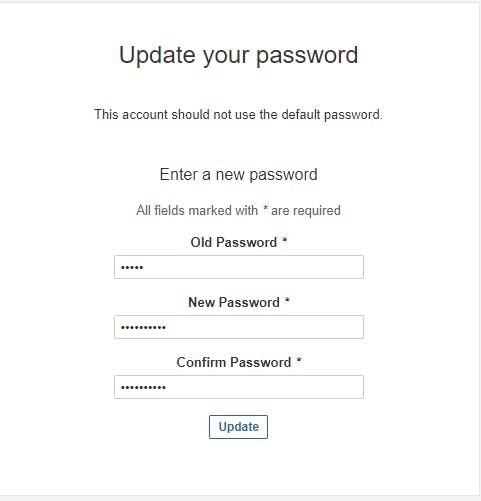
Update the new password. This is the Sonar Dashboard, as shown below.

Check Trivy version
Check the Trivy version in an Ec2 instance.
trivy --version
📚 Step 4: Install Plugins like JDK, Sonarqube Scanner, NodeJs, and OWASP Dependency Check
🎇 4A — Install Plugin
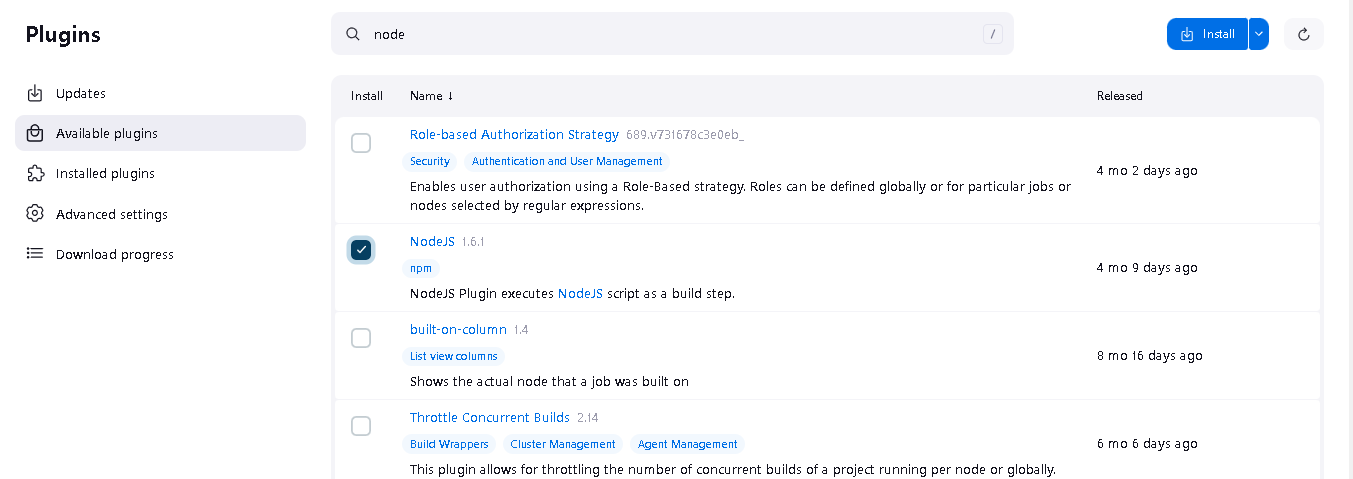
Goto Manage Jenkins →Plugins → Available Plugins
Install below plugins
1: Eclipse Temurin Installer (Install without restart)
2: SonarQube Scanner (Install without restart)
3: Sonar Quality Gates (Install Without restart)
4: NodeJs (Install Without restart)

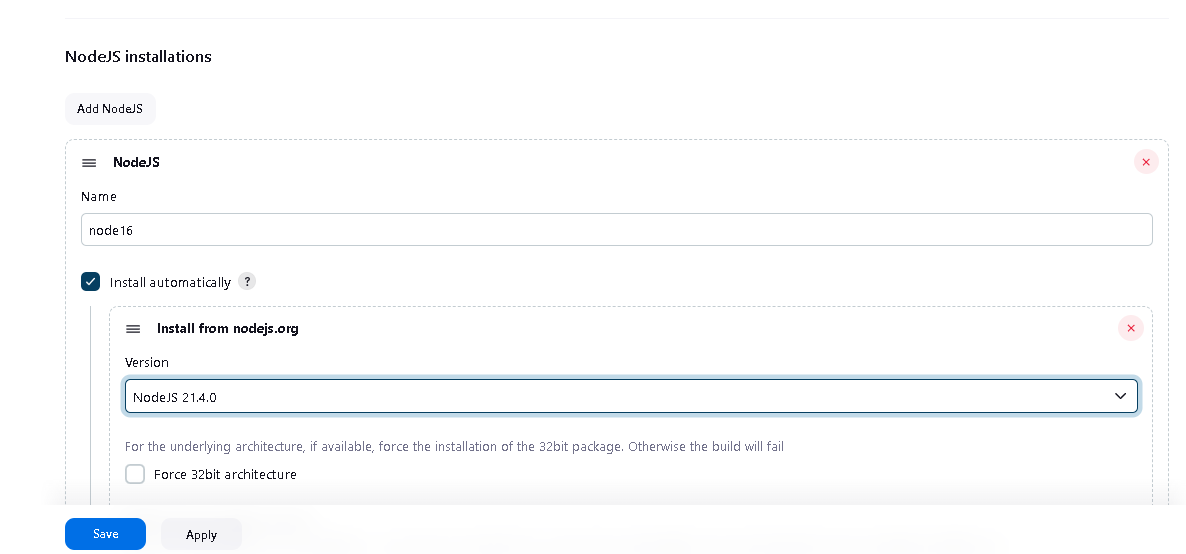
🎇 4B: Configure Java and Nodejs in Global Tool Configuration
Goto Manage Jenkins → Tools → Install JDK (17) and NodeJs (16). Click on Apply and Save

📚 Step 5: Configure Sonar Server in Manage Jenkins
Grab the public IP address of your EC2 instance where sonar is running.
Sonarqube works on Port 9000, so <Public IP>:9000.
Go to your Sonarqube server.
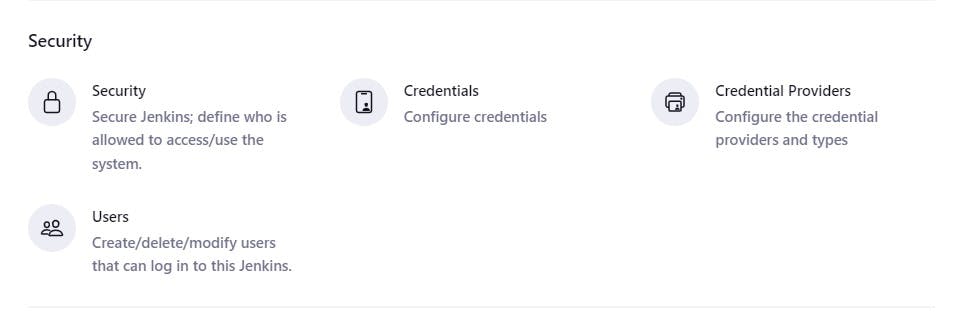
🎇 5A: Create new token in SonarQube
Click on Administration → Security → Users → Click on Tokens and Update Token, → Give it a name, and click on Generate Token

click on update Token

Create a token with a name and generate

copy this Token
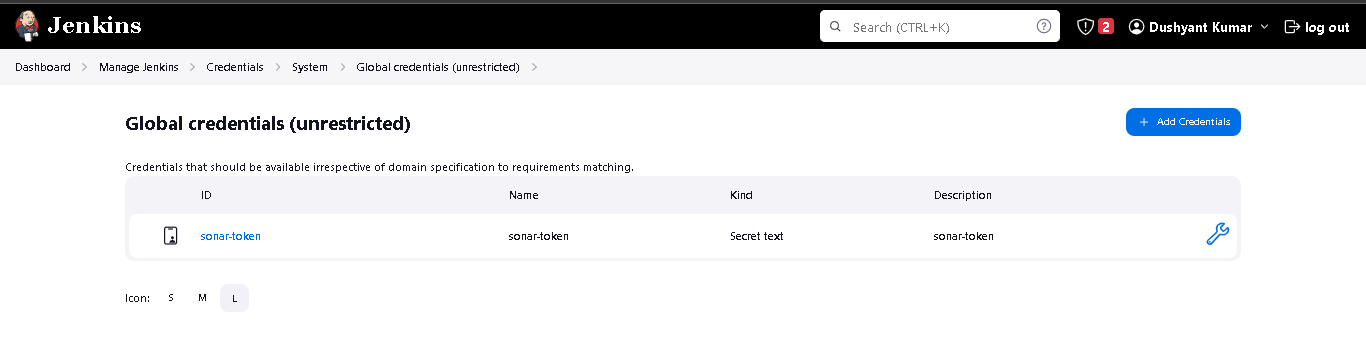
🎇 5B: Configure SonarQube Credentials
Goto Jenkins Dashboard → Manage Jenkins → Credentials → Add secret text. It should look like this

You will see this page once you click on create
🎇 5C: Configure Sonar Server in Manage Jenkins
Now, go to Dashboard → Manage Jenkins → System and add like the below image.
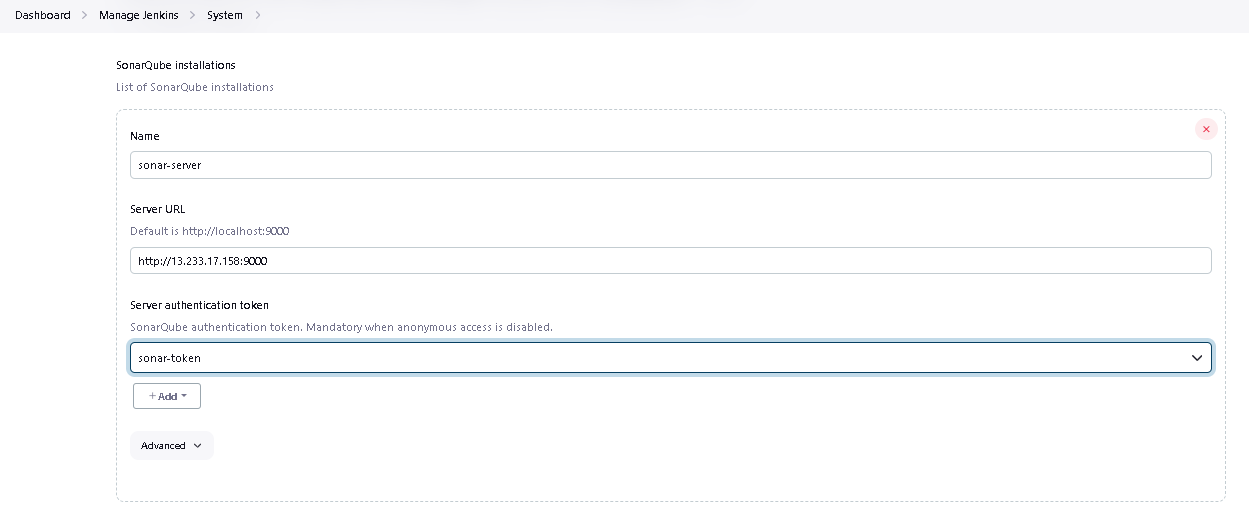
Click on Apply and Save.
The Configure System option is used in Jenkins to configure different server
Global Tool Configuration is used to configure different tools that we install using Plugins
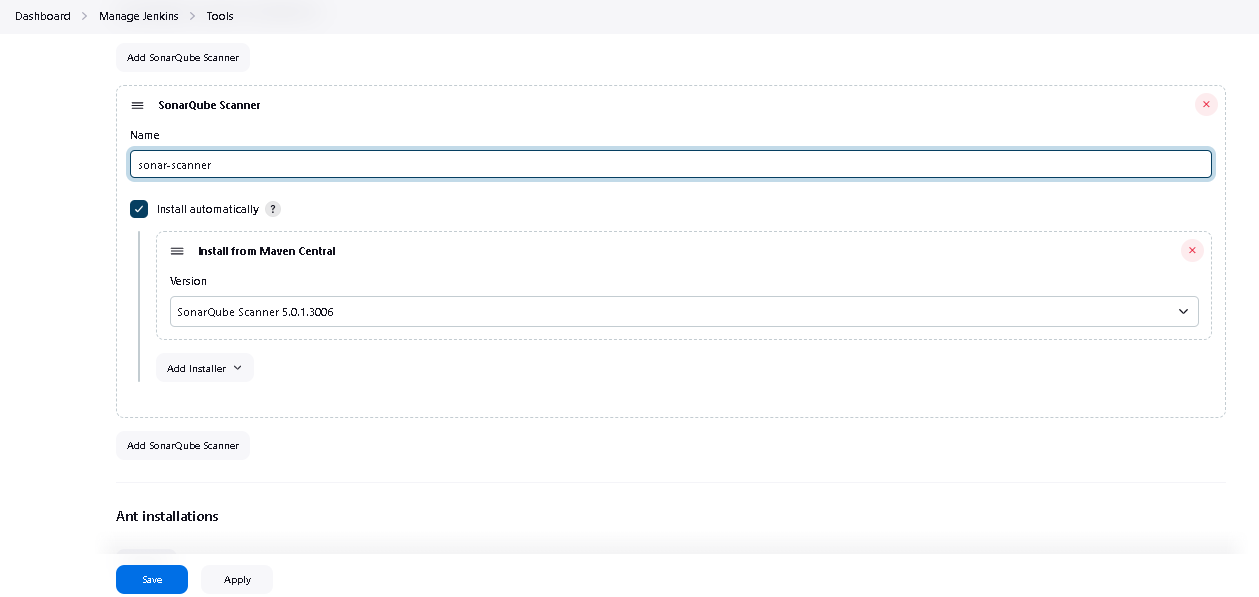
🎇 5D: Configure Sonar Scanner in Manage Jenkins --> Tools
We will install a sonar scanner in the tools.
🎇 5E: Configure Quality gate in SonarQube Server
In the Sonarqube Dashboard, add a quality gate as well.
In the sonar interface, create the quality gate as shown below:
Click on the quality gate, then create.
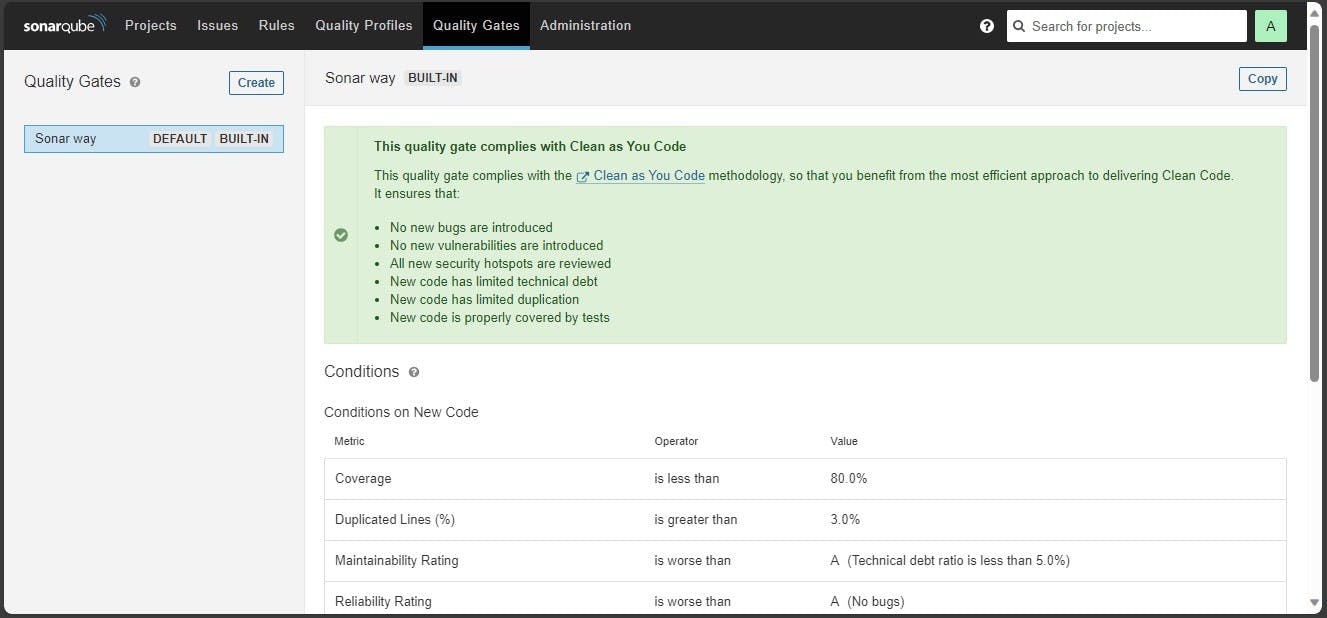
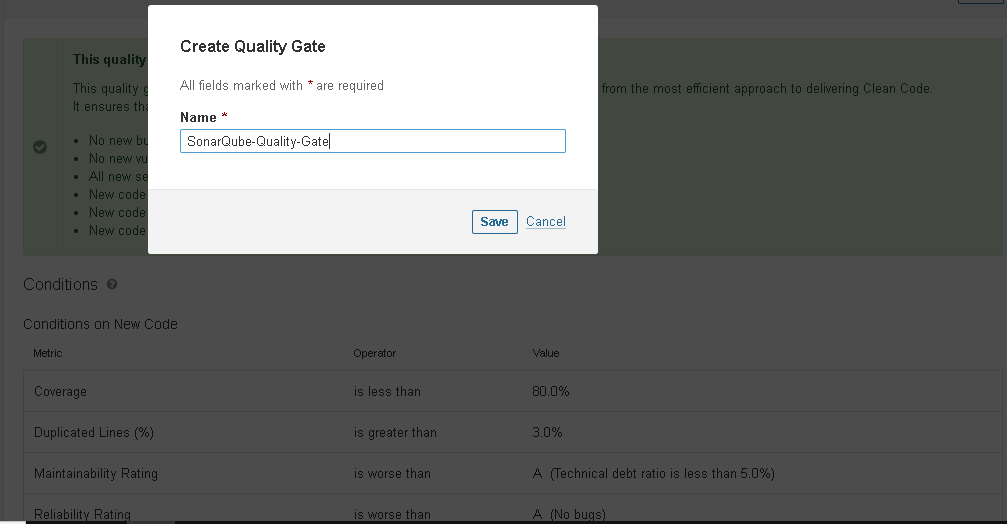
Click on the save option.
In the Sonarqube Dashboard, Create Webhook option as shown in below:
Administration--> Configuration-->Webhooks

Click on Create
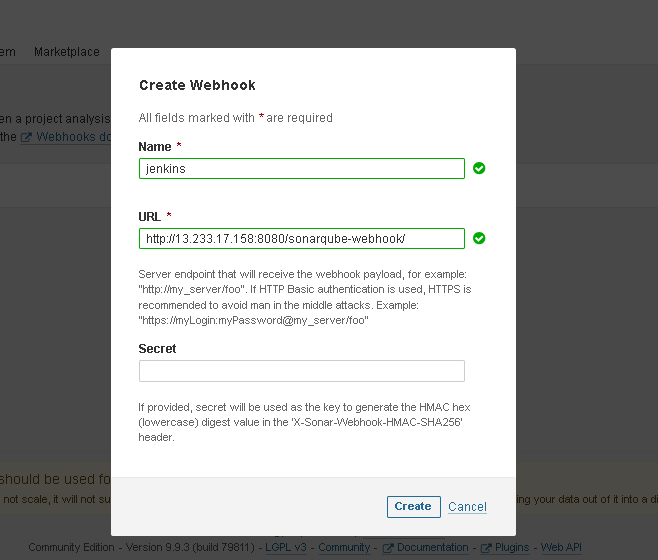
Add details:
<http://jenkins-private-ip:8080>/sonarqube-webhook/
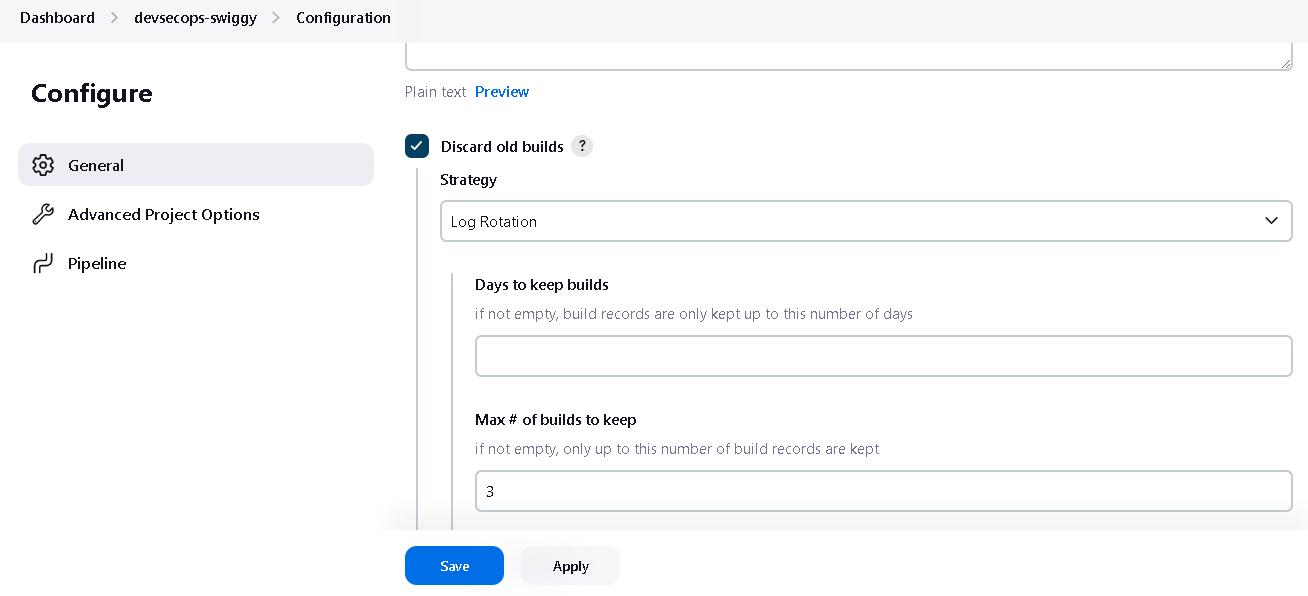
🎇 5F:Setup new pipeline with name "devsecops-swiggy"

If you want help how to write scripted pipeline, use Pipeline Syntax.
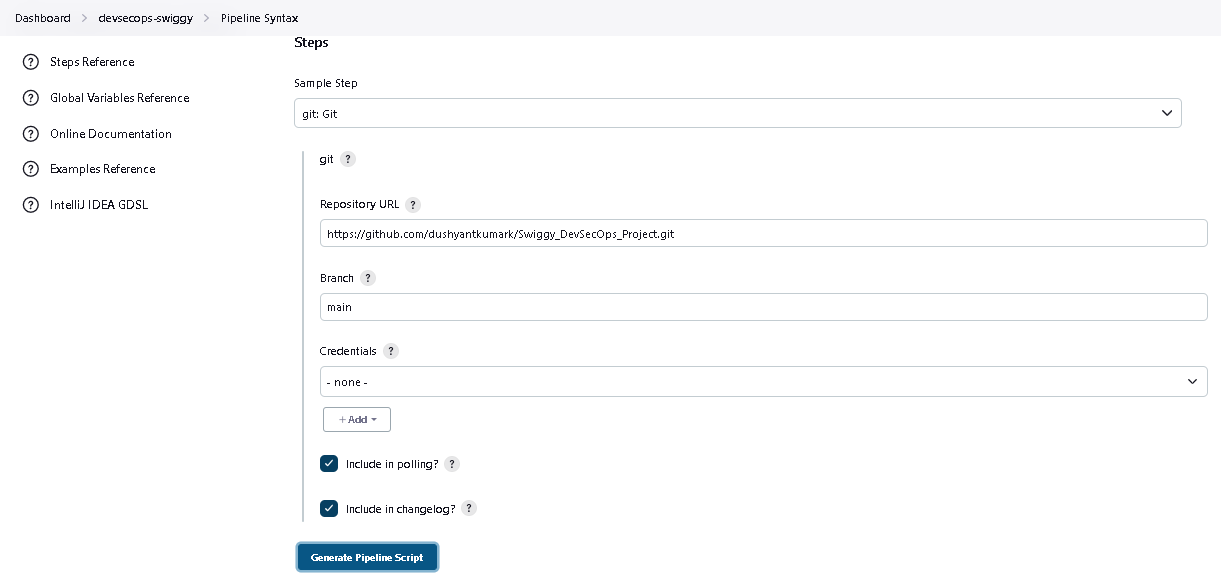
Let's go to our pipeline and add the script to our pipeline script.
pipeline{
    agent any
    tools{
        jdk 'jdk17'
        nodejs 'node16'
    }
    environment {
        SCANNER_HOME=tool 'sonar-scanner'
    }
    stages {
        stage('clean workspace'){
            steps{
                cleanWs()
            }
        }
        stage('Checkout from Git'){
            steps{
                git branch: 'main', url: 'https://github.com/dushyantkumark/Swiggy_DevSecOps_Project.git'
            }
        }
}
Click on Build now, and you will see the stage view like this:

Add more stages such as Sonar analysis, quality gate, install dependencies.
        stage("Sonarqube Analysis "){
            steps{
                withSonarQubeEnv('sonar-server') {
                    sh ''' $SCANNER_HOME/bin/sonar-scanner -Dsonar.projectName=Swiggy-CICD \
                    -Dsonar.projectKey=Swiggy-CICD '''
                }
            }
        }
        stage("quality gate"){
           steps {
                script {
                    waitForQualityGate abortPipeline: false, credentialsId: 'Sonar-token'
                }
            }
        }
        stage('Install Dependencies') {
            steps {
                sh "npm install"
            }
        }
Click on Build now, and you will see the stage view like this:
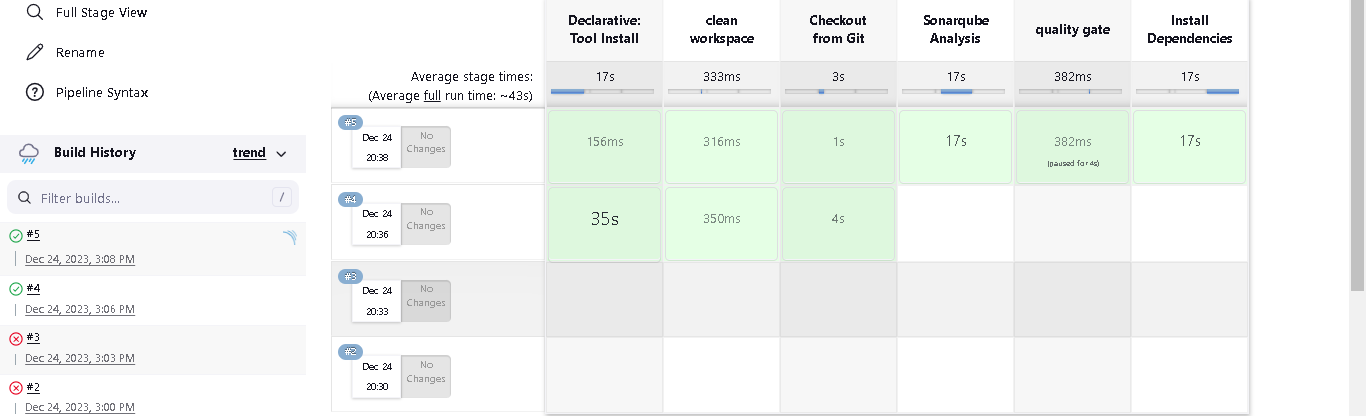
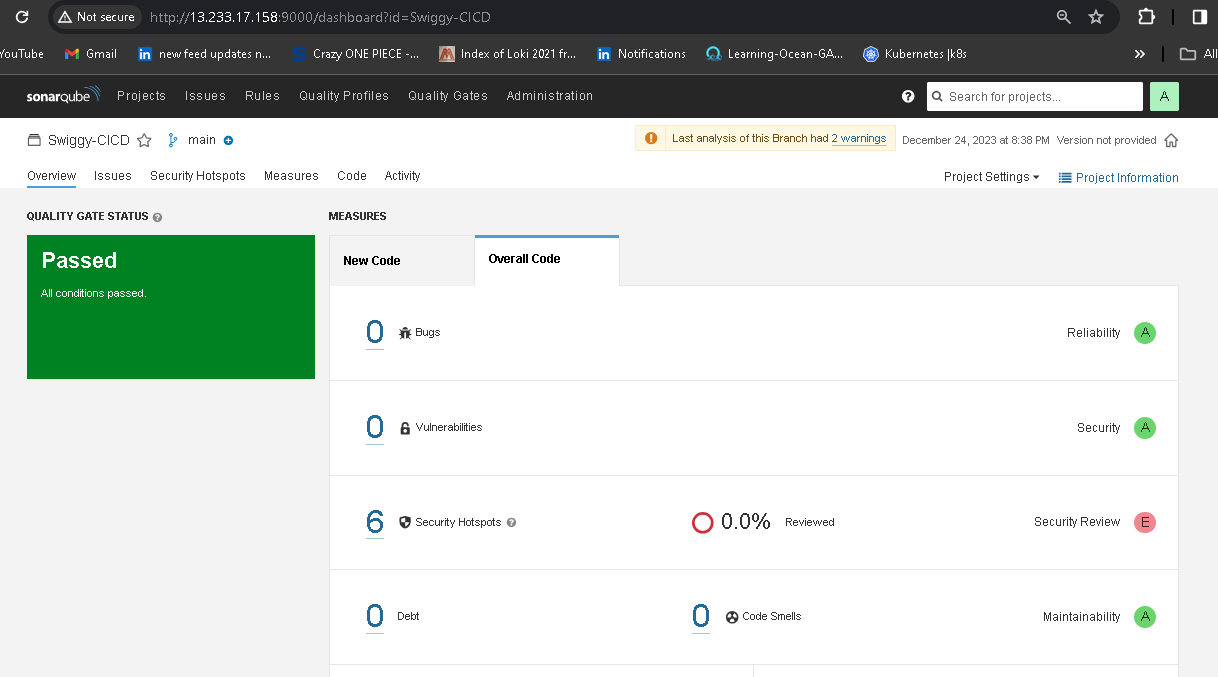
To see the report, you can go to Sonarqube Server and go to Projects.
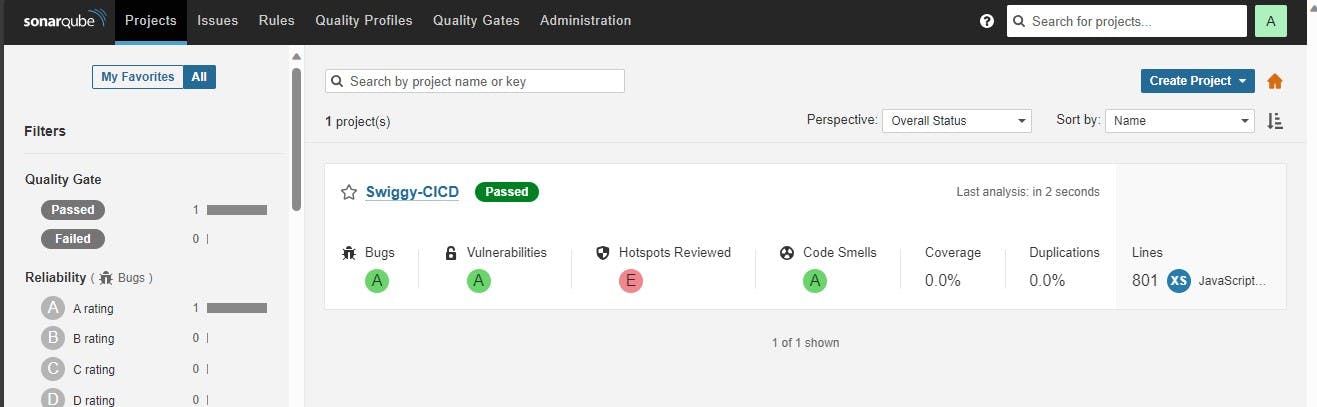
You can see the report has been generated, and the status shows as passed. You can see that there are 801 lines it has scanned. To see a detailed report, you can go to issues.
📚 Step 6: Install OWASP Dependency Check Plugins
Go to Dashboard → Manage Jenkins → Plugins → OWASP Dependency-Check. Click on it and install it without restarting.

First, we configured the plugin, and next, we had to configure the Tool
Goto Dashboard → Manage Jenkins → Tools →

Click on Apply and save here.
Now go to Configure → Pipeline and add this stage to your pipeline and build.
stage('OWASP FS SCAN') {
            steps {
                dependencyCheck additionalArguments: '--scan ./ --disableYarnAudit --disableNodeAudit', odcInstallation: 'DP-Check'
                dependencyCheckPublisher pattern: '**/dependency-check-report.xml'
            }
        }
        stage('TRIVY FS SCAN') {
            steps {
                sh "trivy fs . > trivyfs.txt"
            }
        }
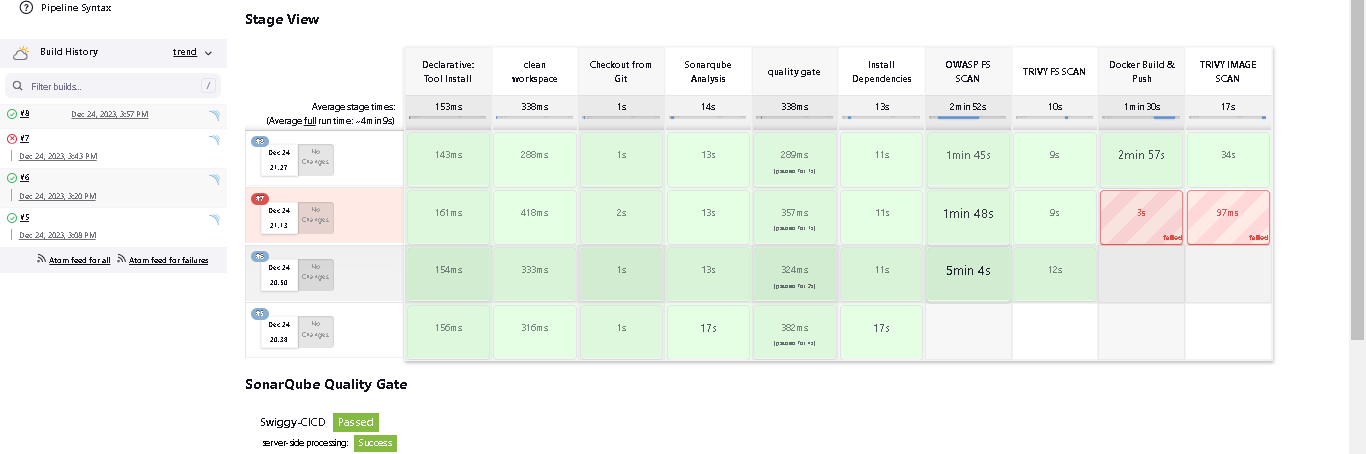
Click on Build now, and you will see the stage view like this:
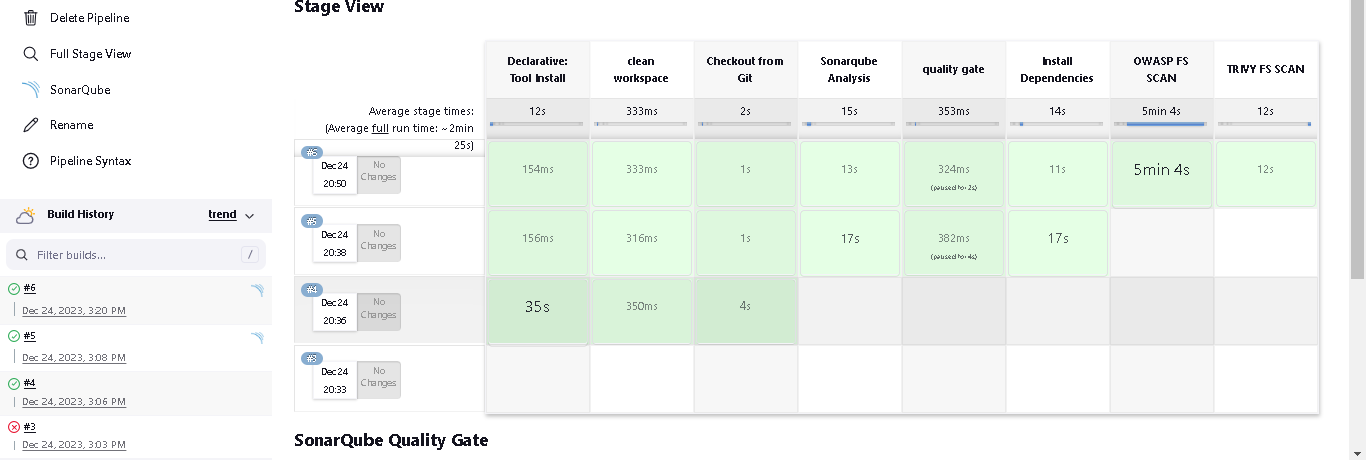
You will see that in status, a graph will also be generated for vulnerabilities.

📚 Step 7: Docker Image Build and Push
We need to install the Docker tool on our system.
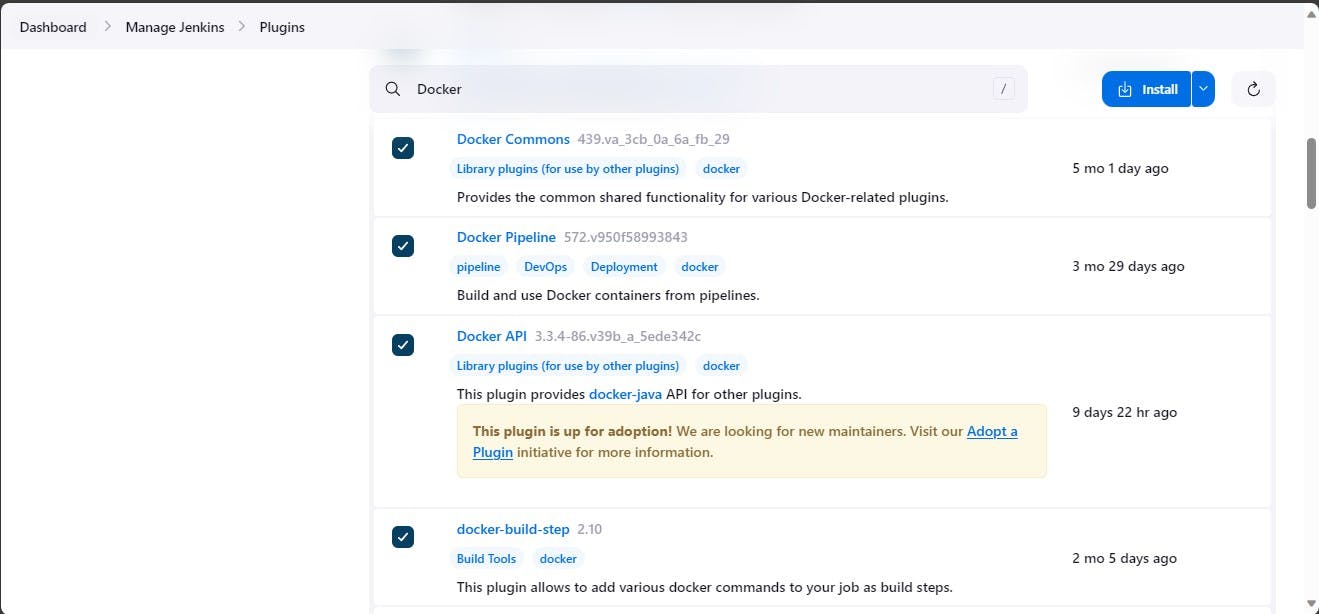
Go to Dashboard → Manage Plugins → Available plugins → Search for Docker and install these plugins.
Install these plugins:
Docker
Docker Commons
Docker Pipeline
Docker API Docker-build-step
Now, goto Dashboard → Manage Jenkins → Tools →

Now go to the Dockerhub repository to generate a token and integrate with Jenkins to push the image to the specific repository.

Click on that My Account, --> Security --> New access token and copy the token.

Goto Jenkins Dashboard → Manage Jenkins → Credentials → Add secret text. It should look like this:

Add this stage to Pipeline Script.
stage("Docker Build & Push"){
            steps{
                script{
                   withDockerRegistry(credentialsId: 'dockerhub', toolName: 'docker'){
                    app.push("${env.BUILD_NUMBER}")
                       sh "docker build -t swiggy-app ."
                       sh "docker tag swiggy-app dushyantkumark/swiggy-app:latest "
                       sh "docker push dushyantkumark/swiggy-app:latest "
                    }
                }
            }
        }
        stage("TRIVY IMAGE SCAN"){
            steps{
                sh "trivy image dushyantkumark/swiggy-app:latest > trivyimage.txt"
            }
        }
When you log in to Dockerhub, you will see a new image is created.

Now test the swiggy application is running or not.
Add this stage to Pipeline Script.
stage("Depoy to container"){
            steps{
                sh "docker run -d -p 3000:80 --name swiggy dushyantkumark/swiggy:latest"
            }
        }
Now access your application.

📚 Step 8: Creation of EKS Cluster with ArgoCD
Installation of KUBECTL, EKSCTL, AWS CLI are done at the time of ec2 instance creation using terraform.
🎇 8A: Creation of EKS Cluster
Now let's configure aws cli credentials for eks creation in us-east-1 region.
aws configure
# add accessKey, secretAccessKey, region, output format.
Command to Create EKS Cluster using eksctl command:
eksctl create cluster --name <name-of-cluster> --region <regionName> --node-type <instance-type> --nodes-min <min-no-of-nodes> --nodes-max <max-no-of-nodes>

eksctl create cluster --name swiggy-cluster --region us-east-1 --node-type t2.medium --nodes-min 2 --nodes-max 4
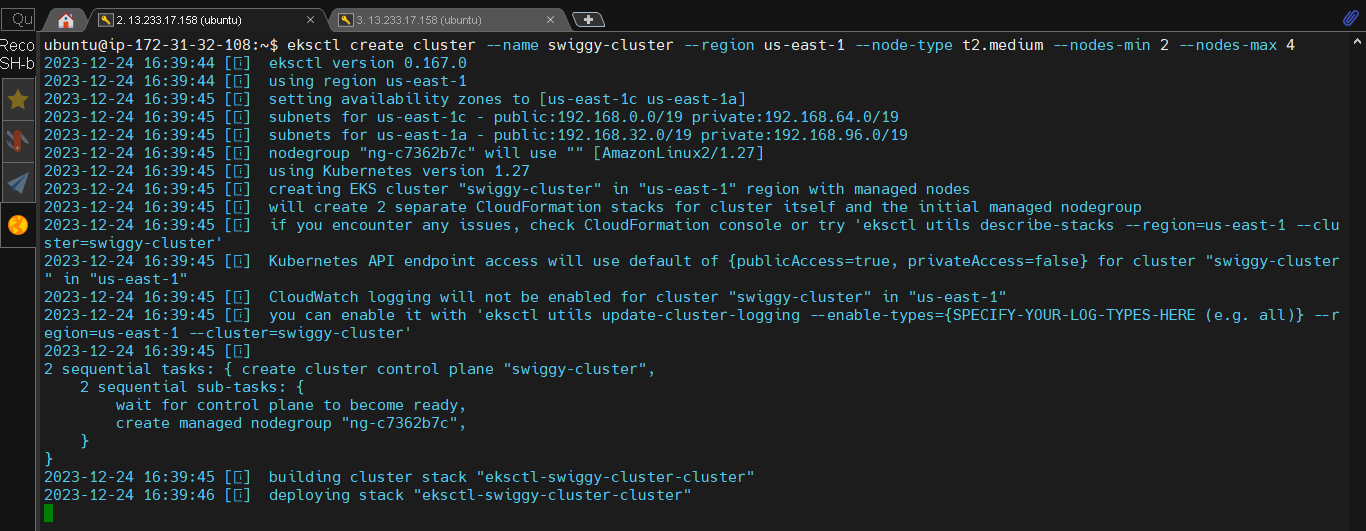
It will take 10–15 minutes to create a cluster.

Check your cloudformation stack and ekscluster.
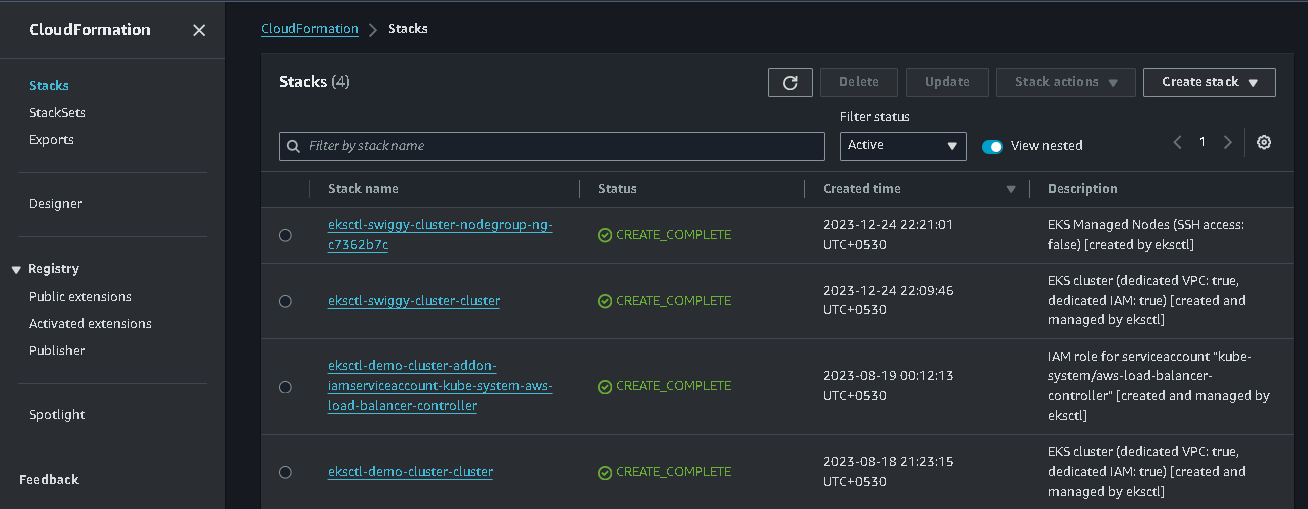

As you will see in the EC2 instances nodes running in the name of EKS Cluster (swiggy-cluster) as shown below.

EKS Cluster is up and ready and check with the below command.
kubectl get no
kubectl get po
🎇 8B: Installing ArgoCD
Now let's install ArgoCD in the EKS Cluster.
kubectl create ns argocd
# This will create a new namespace, argocd, where Argo CD services and application resources will live.
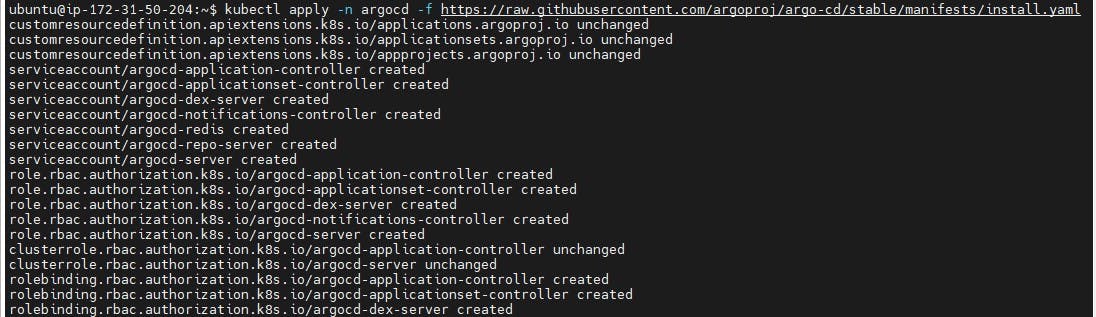
kubectl create namespace argocd
kubectl apply -n argocd -f https://raw.githubusercontent.com/argoproj/argo-cd/v2.4.7/manifests/install.yaml
Download Argo CD CLI:
curl -sSL -o argocd-linux-amd64 https://github.com/argoproj/argo-cd/releases/latest/download/argocd-linux-amd64
sudo install -m 555 argocd-linux-amd64 /usr/local/bin/argocd
Access The Argo CD API Server:
# By default, the Argo CD API server is not exposed with an external IP. To access the API server,
choose one of the following techniques to expose the Argo CD API server:
* Service Type Load Balancer
* Port Forwarding
Let's go with Service Type Load Balancer.
# Change the argocd-server service type to LoadBalancer.
kubectl patch svc argocd-server -n argocd -p '{"spec": {"type": "LoadBalancer"}}'
Wait about 2 minutes for the LoadBalancer creation
export ARGOCD_SERVER=kubectl get svc argocd-server -n argocd -o json | jq --raw-output '.status.loadBalancer.ingress[0].hostname'
The initial password is autogenerated with the pod name of the ArgoCD API server.
export ARGO_PWD=`kubectl -n argocd get secret argocd-initial-admin-secret -o jsonpath="{.data.password}" | base64 -d`
NOW get the loadbalancer url and argocd password.
echo $ARGOCD_SERVER
echo $ARGO_PWD

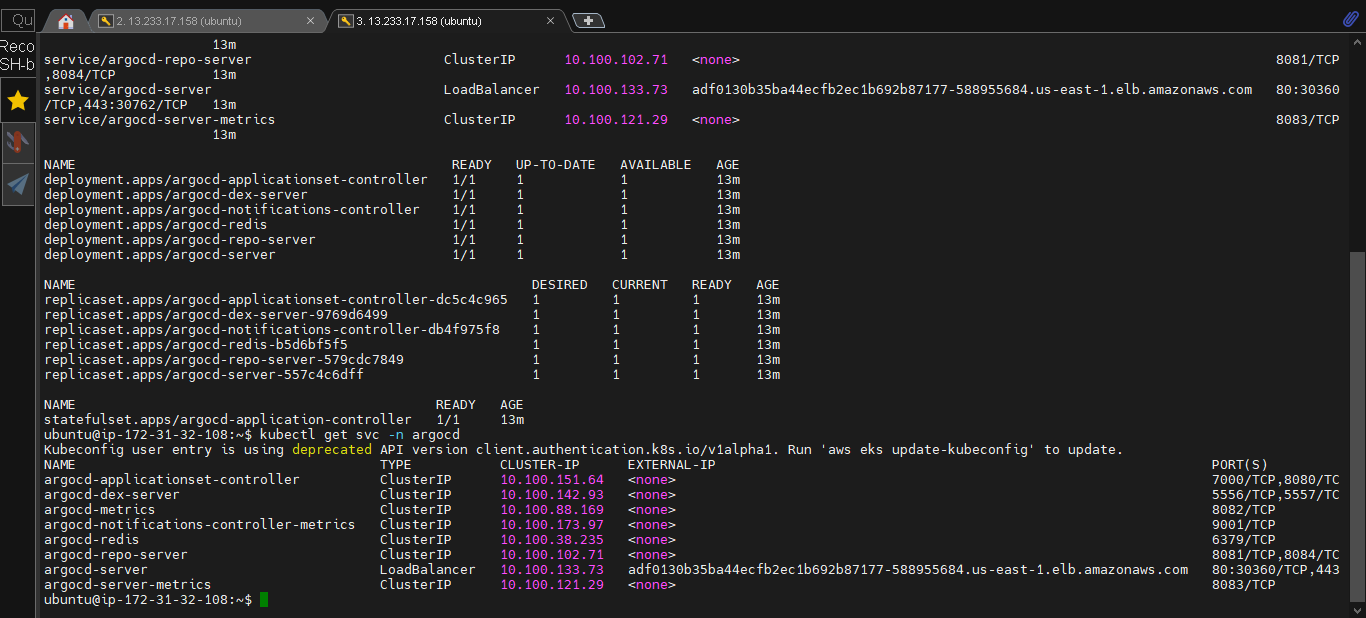
List the resources in the namespace:
kubectl get all -n argocd

Get the load balancer URL:
kubectl get svc -n argocd
Lets create new namespace for application.
kubectl create ns swiggy
Pickup the URL and paste it into the web to get the UI as shown below image:

Login Using ARGO_PWD**:**
echo ARGO_PWD

Login with the admin and Password in the above you will get an interface as shown below:

Lets connect with github repository:


Now deploy an application, first we have to configure the details in Application.

Enter the Repository URL, set path to ./, Cluster URL to kubernetes.default.svc, the namespace to swiggy and click save.
The GitHub URL is the Kubernetes Manifest files which I have stored and the pushed image is used in the Kubernetes deployment files.
Repo Link: https://github.com/dushyantkumark/Swiggy_DevSecOps_Project.git

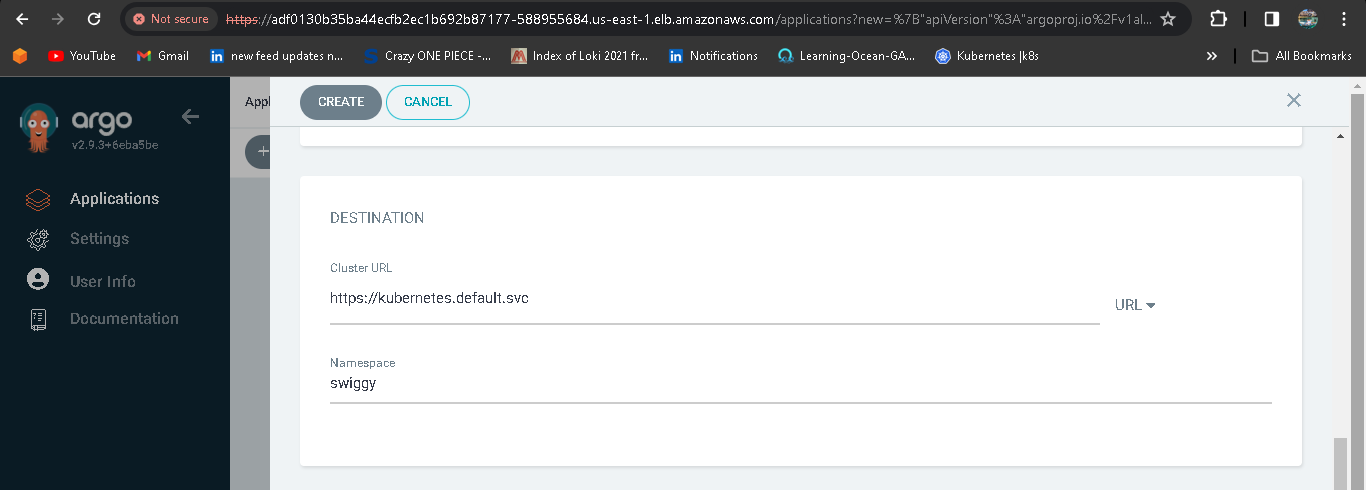
You should see the below, once you're done with the details.

Click on it.
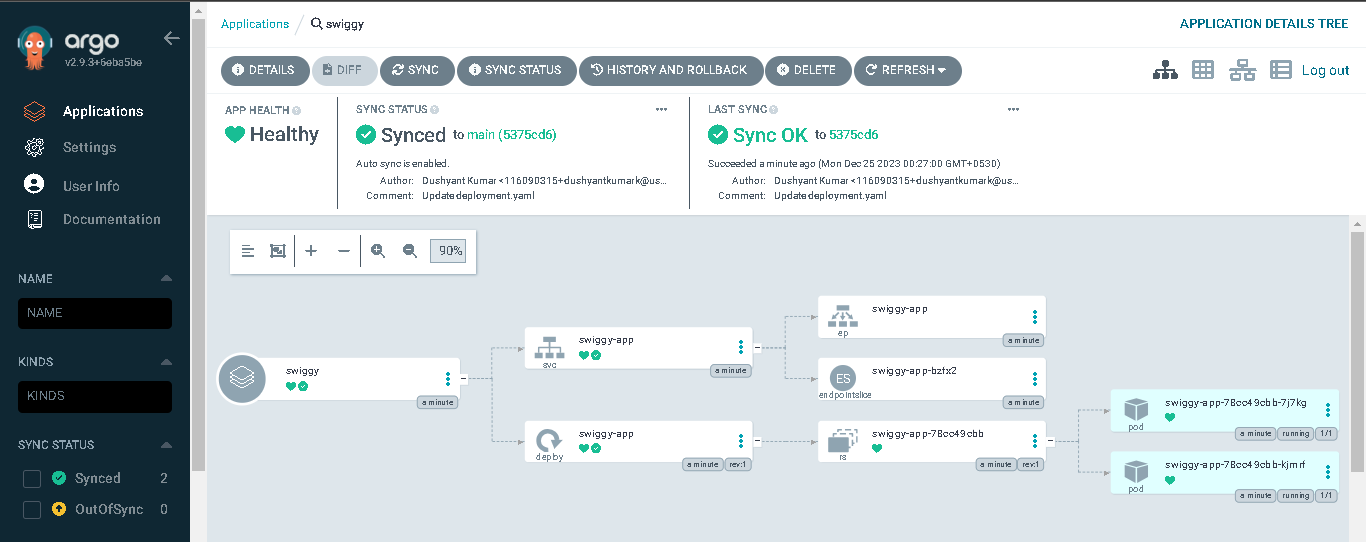
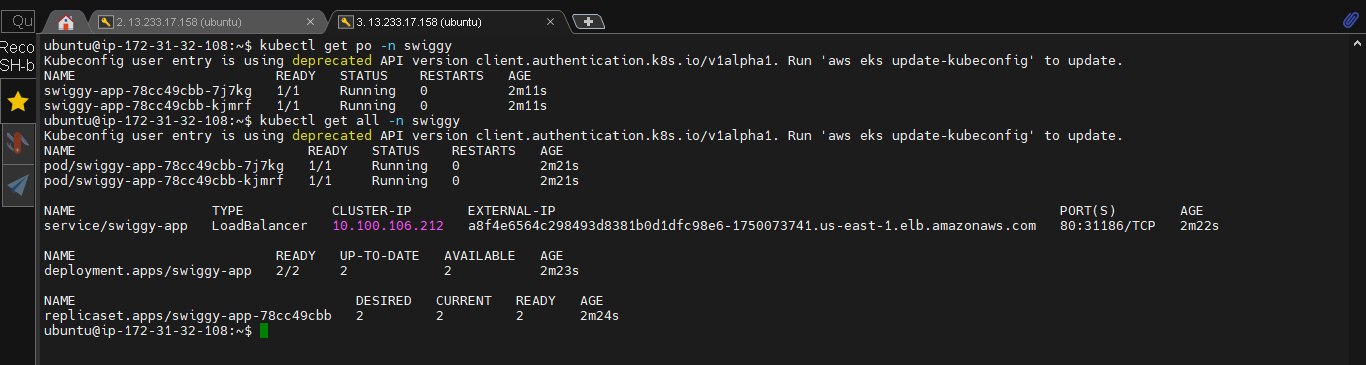
You can see the pods running in the EKS Cluster.
kubectl get po -n swiggy
kubectl get all -n swiggy
With the above load balancer, you will be able to see the output as shown in the below image:

🔥 Step 9: Clean up your resources:
- Delete your Cluster
eksctl delete cluster --name swiggy-cluster

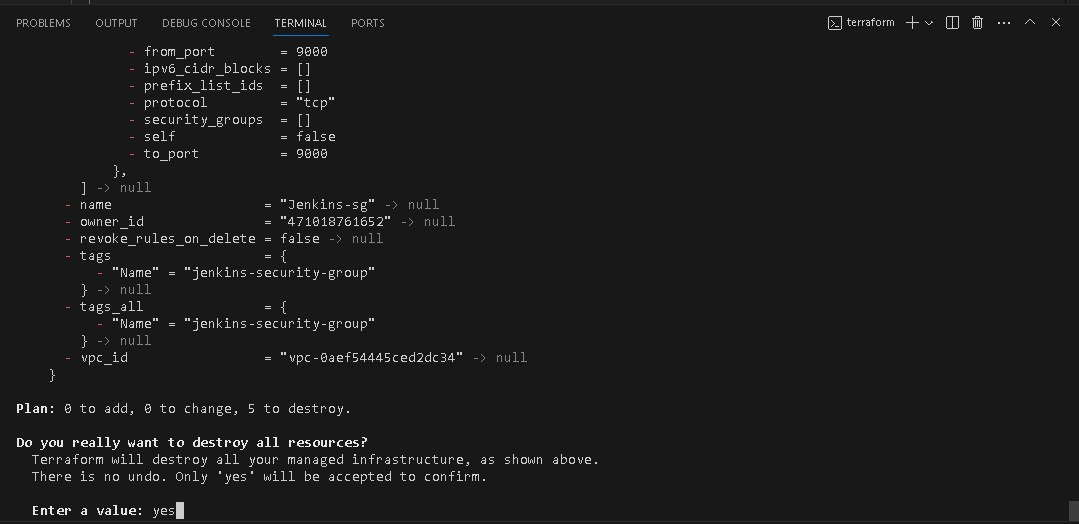
- Destroy your Infrastructure using terraform from your laptop (windows)
terraform destroy
- Delete IAM credentials you create, remove policies from users.
Conclusion:
In this project, we have covered the essential steps to deploy a Swiggy app with a strong focus on security through a DevSecOps approach. By leveraging tools like Terraform, Jenkins CI/CD, SonarQube, Trivy, Argocd, and EKS, we can create a robust and secure pipeline for deploying applications on AWS.
Remember that security is an ongoing process, and it is crucial to stay updated with the latest security practices and continuously monitor and improve the security of your applications. With the knowledge gained from this guide, you can enhance your DevSecOps skills and ensure the smooth and efficient deployment of secure applications on Amazon Web Services.
\...................................................................................................................................................
The above information is up to my understanding. Suggestions are always welcome. Thanks for reading this article.
#docker #aws #cloudcomputing #Devops #kubernetes #devsecops #sonarqube #trivy #owasp #TrainWithShubham #90daysofdevopsc #happylearning
Follow for many such contents:
LinkedIn: linkedin.com/in/dushyant-kumar-dk
Blog: dushyantkumark.hashnode.dev
Github: https://github.com/dushyantkumark/Swiggy_DevSecOps_Project.git


